


5ft & 6ft Clothes Rail Assembly Guide
This guide covers all aspects of assembly for 5ft and 6ft wide products in our Clothes Rails range:
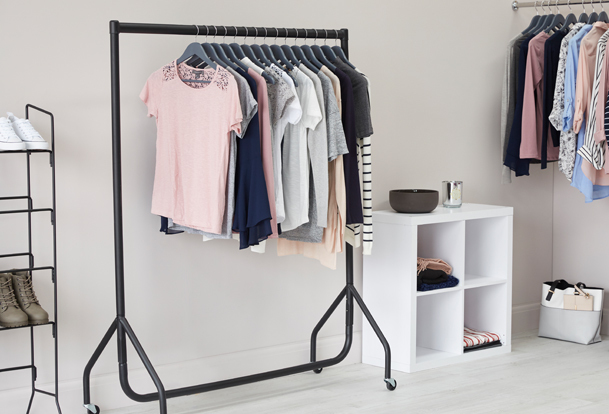
• Heavy Duty Rails (See featured image)
• Extra Tall Rails - Heavy Duty Rails with height extensions
• 2 Tier or 'Double' Rails - Heavy Duty Rails with height extensions and centre bars
Construction: Different Heavy Duty Clothes Rails may be constructed differently. Depending upon the width of your unit, the number of pieces may vary. If you have a 2ft, 3ft or 4ft Clothes Rail, please refer to our 2ft/3ft/4ft Clothes Rail Assembly Guide.
Specific Pieces: Some models come with additional pieces like Height Extensions or Wire Shelves. Check the model specific instruction below for how to fit these parts.
Important: Do not attempt to assemble the Rail or Castors without reading these instructions fully.
Important Note For 2-Tier Rail: The Centre Rail MUST be installed first before attaching the height extensions. See below for full instructions.
Important Safety Information
- Read through all instructions on this page before beginning any assembly
- If you think that you have received defective parts please do not use and contact us
- If you are unsure about assembly, please ask our team
- Assemble in a suitable space and on a sturdy and level surface
- Check structure is secure before use
- Do not use on an uneven or non-flat surface
- Do not use any sharp tools
- Do not overload your rail
Tools Required
- Rubber Mallet: optional
- Gloves recommended, but not essential
Other Information
- Best assembled by 2 able people
- Assembly will void returns, except if a manufacturing fault is found.
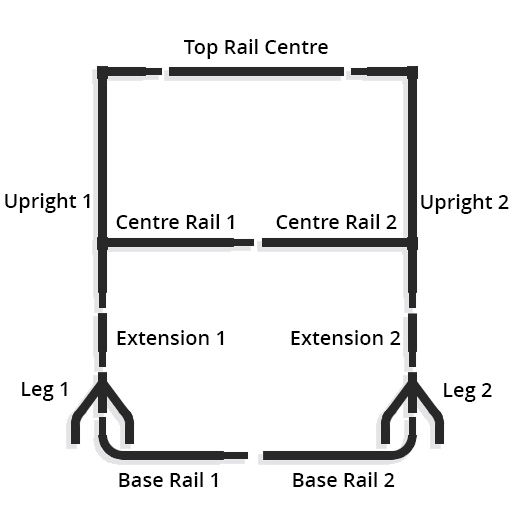
General Clothes Rails Construction
The component parts and construction of your Clothes Rail depends upon the width, height, colour and style that you purchased, these are the main types, note that some have additional parts like shelves that are not shown in these diagrams, they can be found in the general assembly instructions later on in this guide.
5ft/6ft - Black/White/Silver
This is the 'Compact' type (see below)
5ft/6ft - Chrome/With Shelves
This is a 'Tension Fitted' rail (see below)
5ft/6ft - Extra Tall - Black/White/Silver
This is the 'Compact' type (see below)
5ft/6ft - Two Tier - Black/White/Silver
This is the 'Compact' type (see below)
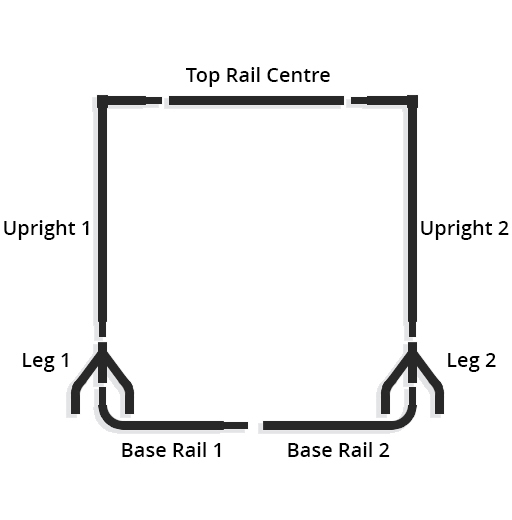
Completing the 'Compact' Models (Split Top Rail)
The 'Compact' style is called this because the sections are shorter than the standard style which means they are easier to store collapsed, without any compromise on strength.
Note: the word 'Compact' may not appear in the product name. For reference: Compact models are only available in 5ft or 6ft rails. The 2ft, 3ft & 4ft rails are always the standard style.
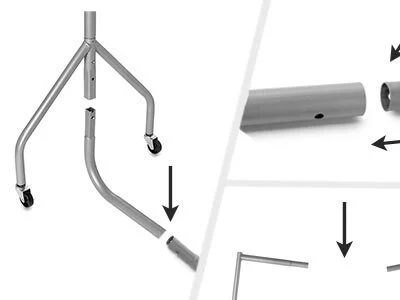
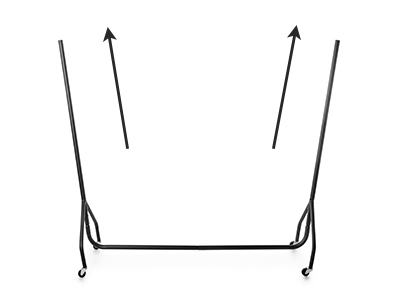
Connecting the Base & Uprights separately
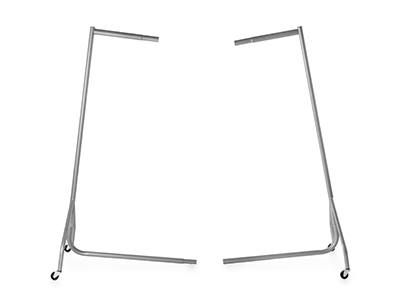
Once you have attached the legs, uprights and base bars together you should have two assemblies like this.
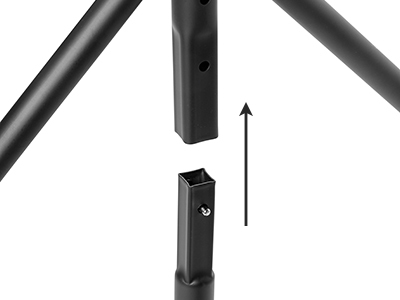
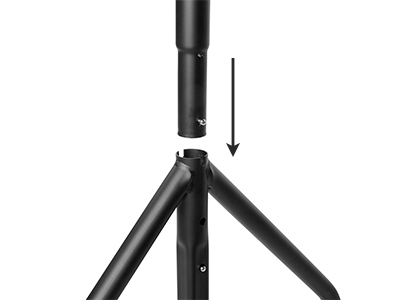
Connecting the Top Rail into the Uprights
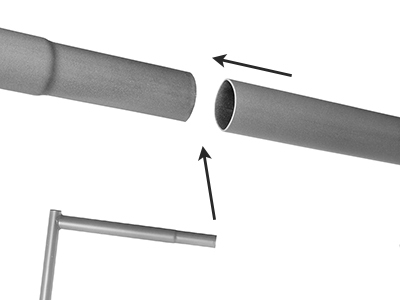
The uprights in the 'Compact' models have part of the top rail already attached to them, and you will have received a centre rail piece which is connected to the uprights as above.
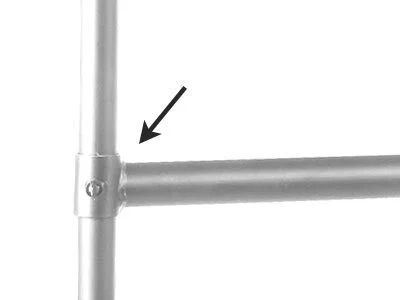
Connecting the Base Bars to finish the Rail
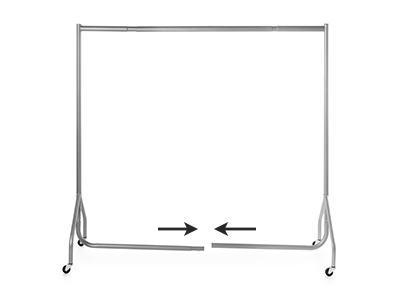
Once the top rail is complete you should be able to slot the two base bars together. Make sure the push pins are lined up and click into the corresponding fixing holes.
Completing the 'Compact' 2-Tier Models (Split Top Rail)
The 'Compact' style is called this because the sections are shorter than the standard style which means they are easier to store collapsed, without any compromise on strength. Compact models are only available in 5ft or 6ft rails.
IMPORTANT: The centre rail MUST be installed first before attaching to the extensions.
Attach legs to Base Rail and fit the Top Rail
Connect the legs to the two sections of the base rail making sure the push pins ‘click’ into their locking holes, this should hold the bottom of the structure together Note: The legs will be leaning outwards slightly, this is normal. Then, attach one end of the top rail centre to one of the uprights, and then using the other end of the top rail centre, connect to the other upright so all three sections are fitted together securely.
Attach the Centre Rail
IMPORTANT: The centre rail MUST be installed first before attaching to the extensions. Connect the two parts of the centre rail together. Then slide the full centre rail over both uprights
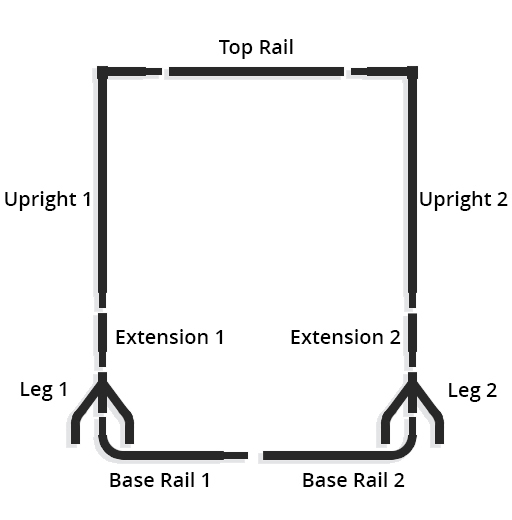
Connect Extensions & Upright Sections
Push the uprights into the legs making sure the push pins ‘click’ into their locking holes. Connect the uprights with the adjoining centre rail together with the extensions to lock together all rail sections. Your rail is now complete.
Fitting the Standard Castors/Wheels
NOTE: For the model with Top and Bottom Shelf, you must add the Bottom Shelf Brackets before adding the Castors/Wheels - see further up the page.
Step 1
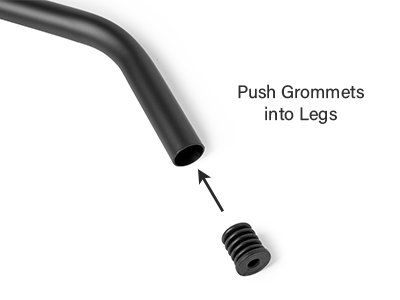
IMPORTANT: If you attach the grommet to the wheels before pushing into the legs, you will not be able to fit the wheels properly. You may want to use a rubber mallet to knock them in.
Step 2
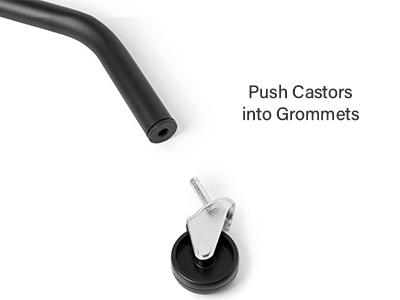
The castors should click-lock into the grommets and be able to swivel. Repeat for all four castor wheels.
Completing the Rail with Shelves
Fit the 'Y' Bracket and Top Wire Shelf
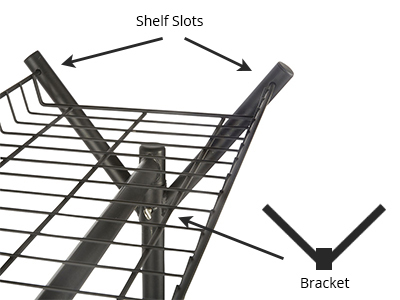
The 'Y' shaped brackets must be put on to the uprights before the top rail. Once the top rail is added, slide the bracket up to meet it and tighten the fixing screws by hand very tightly. The wire shelf slots into the two holes, so make sure they face inside when adding the brackets.
Fit the Bottom Shelf Bracket and Wire Shelf
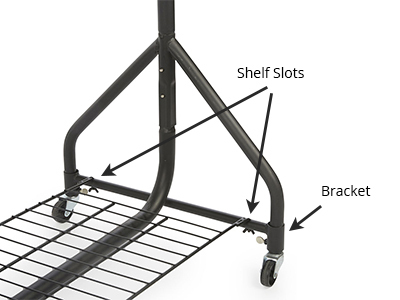
The bottom shelf fits into a special bracket that has two holes. The bracket must be fitted before the wheels, and is screwed in place. Then fit the shelf into the slots and tighten the wing nuts.
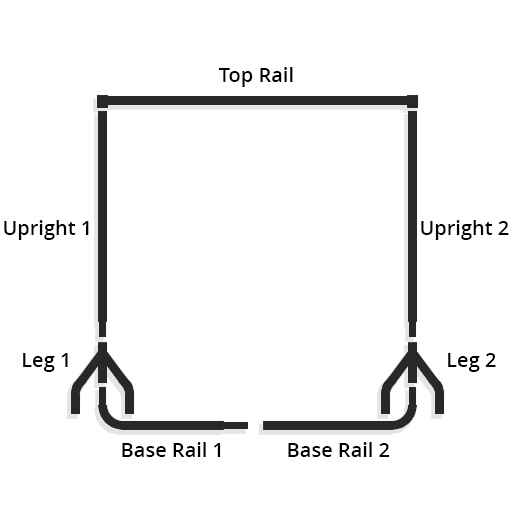
Constructing 'Tension Fitted' Model
1. Attaching the Legs to the Base Bar(s)
Connect the square ends into the square leg poles as shown. Make sure that the push pins are lined up and 'click' into the corresponding fixing holes.
2. Connecting the Base Bars

The 2 base bars will need to be connected together before attaching to the legs. Make sure the push pins are lined up and click into the corresponding fixing holes.
3. Connecting Uprights/Extensions to the Base Bar
Following the correct construction type shown above, connect the uprights and/or extensions (if you have some), lining up the push pins so they 'click' into the corresponding fixing holes.
Completing the 'Tension Fitted' Models (Single Top Rail)
'Tension Fitted' models - the Uprights won't be straight
Once the base and uprights are assembled, you will find that the uprights are not pointing straight up. This is normal for models with a single top rail as they are tension fitted.
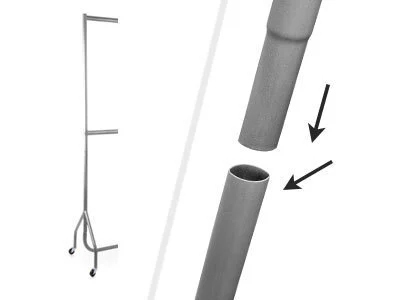
Push-fit the Top Rail into one of the Uprights
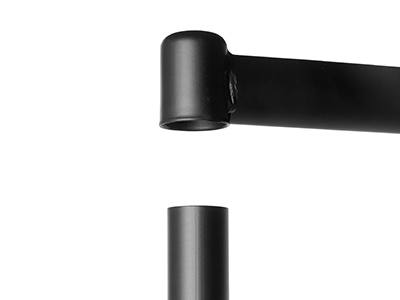
Push one end of the top rail into one of the uprights (or extensions) and push down as far as it will go.
Pull the second Upright inwards and push Top Rail on
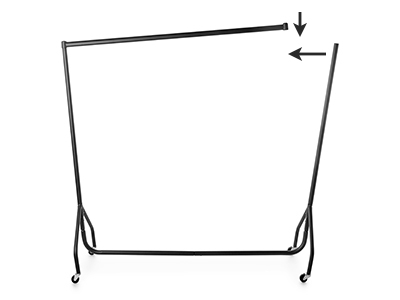
Pull the other upright inwards until you can push the other end of the top rail down on to it to complete the rail.